This article will guide you on the steps to utilize the tenant screening process before a property address is chosen
If no property is added, the applicant's current address will be used to adhere to local law and terms in the area.
1. Login to your dashboard and select the Screening tab on the left menu bar

2. Once on the Screening page, click Screen Tenants
a. If this is your first time initiating a screening, agree to the TransUnion Service Agreement and enter your Home Address information (Click here for more information)
3. Once directed to the Which property are you screening for? page, click the Screen without Property button instead of adding an address
4. You'll then be asked to select if you represent the Landlord or Applicant
5. Once on the Select Application Options page, elect who will pay the screening fee and select which bundle you would like to include:
- Standard:
- Rental Application (If you need to use the CAR Rental Application, please add a property before screening)
- Credit Report & Score
- Criminal Background Check
- Eviction Related Proceedings
- Income Verification Documents (Only available for select RentSpree accounts):
- Everything in the Standard
- Income Verification Report
- Document Upload Request
- Automated Reference Checks
6. After selecting your screening items, click Next to be directed to the How will applicants apply? page to send or showcase your screening request with the following methods below:
Send the request to the applicants' email/text
- To send a request directly to your applicant's email or phone, click Request applications by email or text message
- You may then select to send the request through the applicant's email or phone number. If you have more than one applicant you would like to send a request, you may enter a comma after each email address or phone number entered
- Once the applicant's email or phone number is entered, click Send Request(s)
- Applicants will receive an email or text message requesting them to apply and complete their submission.
- If the email request is not showing in the applicant's inbox, they may need to check their spam inbox, or automated folders such as PROMOTIONS, etc
- If a request was sent via text, the applicant will receive a text providing them with your name and a link to apply through RentSpree.
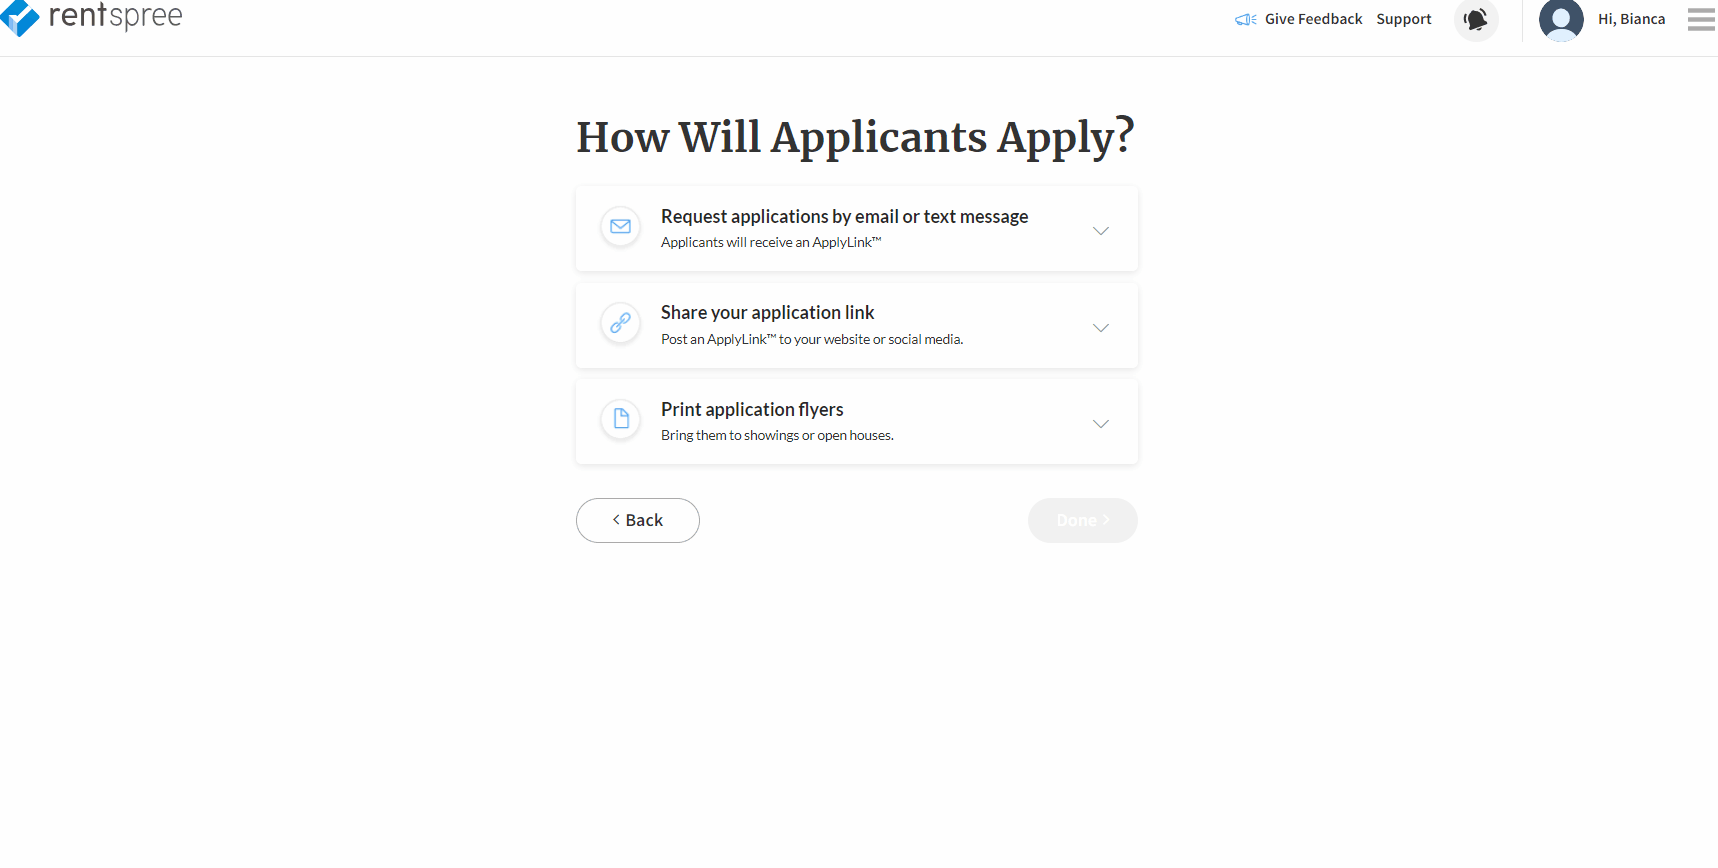
Post or Share the Application Link
- To view the link that you may copy and paste on your MLS, website, or social media pages, click Share your application link
- Click Copy to copy the link that is shown and generated specifically from your RentSpree account
- You may then paste the ApplyLink™ into a medium of your choice
- The ApplyLink™ are versatile, they can be used by multiple applicants to complete their submission
Print Application Flyers
- To create a flyer that shows your contact information and how to apply, click Print application flyers
- In the rectangle that states, "Enter your custom message here," you may enter a customized message such as a license number or welcome/thank you message
- Click Print to generate the PDF flyer that you may print out for any open houses or showings you host
- The Application flyer contains an ApplyLink™ that can be typed directly into a browser by an applicant. It also has a QR code that may be scanned with a smartphone too
Viewing the Application and Reports After Submission
Once a submission has been completed, you can view the application and reports without adding a property.
Please note that you will not see the Accept/Deny or Share buttons until a property address has been added.