You can screen tenants from your RentSpree dashboard once you’ve added the property. Add or select your property, choose what to include in the application, then send the request to applicants.
Note: If you’re the renter’s agent, check with the listing agent first to confirm their preferred screening method or that you’re cleared to screen and share the reports.
How to screen tenants with a property listing
-
From the left menu, select Screening, then Screen Tenants. The first time, enter your personal information and agree to the TransUnion Service Agreement.
-
Choose a property from the drop-down menu, or select + Add New Property and enter the address. Review it carefully, since the address can’t be changed once confirmed.
-
Confirm the address and select your role, such as listing agent or landlord. If you’re the listing agent, add the landlord’s contact information. If you’re asked how you’d like to find applicants, select Create a screening request now. Selecting Market your property instead starts a listing.

-
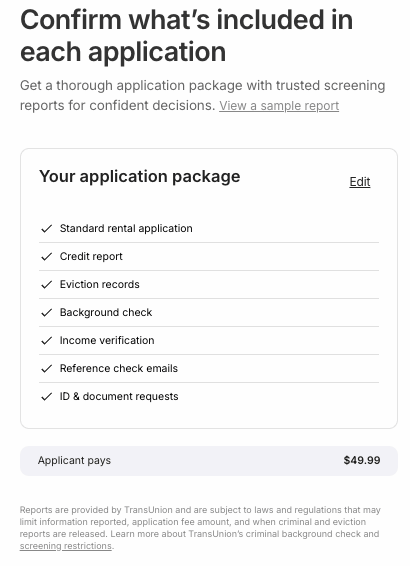
On the confirmation page, select Next to use the preset options, or Edit to customize what’s included:
- Rental application, or the C.A.R. rental application or Texas REALTORS application, each tied to a validated association membership. See Request a C.A.R. rental application or How to request the Texas REALTORS application for how it works.
- Credit report and score
- Criminal background report
- Eviction history report
- Advanced verification, including income verification, document upload, and auto reference checks
- Who pays the application fee, the applicant or you
-
Choose how to invite applicants: email or text a screening request, share an application link, or print an application flyer.
Once an applicant submits, you’ll get an email notification. Next: View a completed TransUnion report