The Rental Hub is in beta. It may look different on your account or may not appear for you yet. It will be released to all users in the coming weeks.
If your agent sent you a link to review an applicant, welcome. That link opens your Rental Hub, a workspace your agent already set up for you. Here’s your first visit, start to finish.
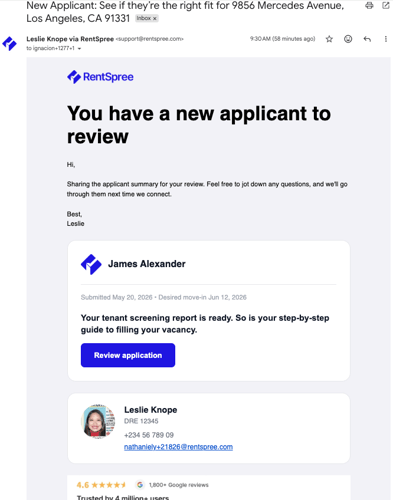
Step 1: Open the link in your agent’s email
Your agent’s email has one button: Review application. Select it and you’ll land in your Rental Hub, where the application is waiting.
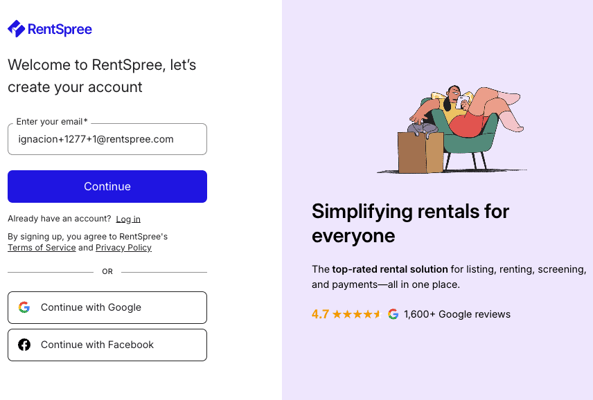
Step 2: Create your account (first time only)
Your email address is already filled in. Set a password and you’re in. If you already have an account, you’ll skip straight to your Hub.
Step 3: Accept the screening agreement (first time only)
Before your first applicant review, you’ll accept a one-time service agreement with TransUnion, the credit bureau behind the screening reports. It’s a legal requirement for accessing applicant data, and you’ll never see it again.
Step 4: Review your applicant
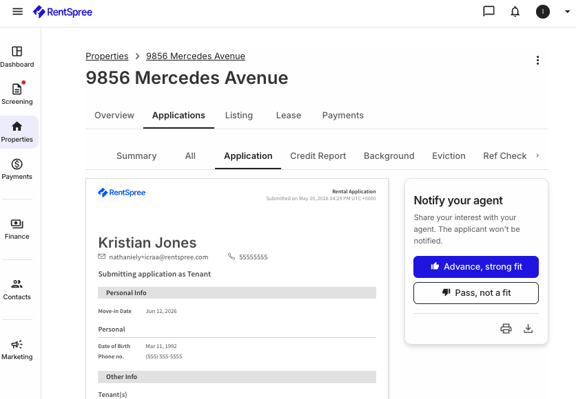
Select Review applicants. A one-minute intro walks you through the process, then you’ll see the full application: credit, background, and rental history in one view.
In the Notify your agent panel, choose Advance, strong fit or Pass, not a fit. Your rating goes only to your agent. The applicant is never notified.
Step 5: Back to your Hub
After you rate the applicant, your Hub checks off the step, advances your progress, and surfaces your next action, typically connecting a bank account so you’re ready to receive rent.
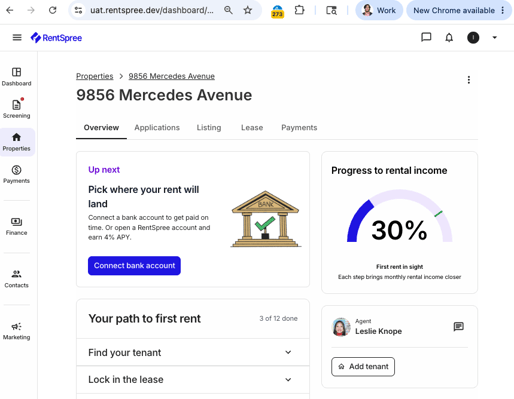
From here your Hub guides the rest: lease setup, bank connection, and rent collection. Understanding your Rental Hub explains how it all fits together.