Collecting a complete TransUnion screening package through RentSpree
To collect a complete TransUnion screening package for members of CAA, follow the steps below:
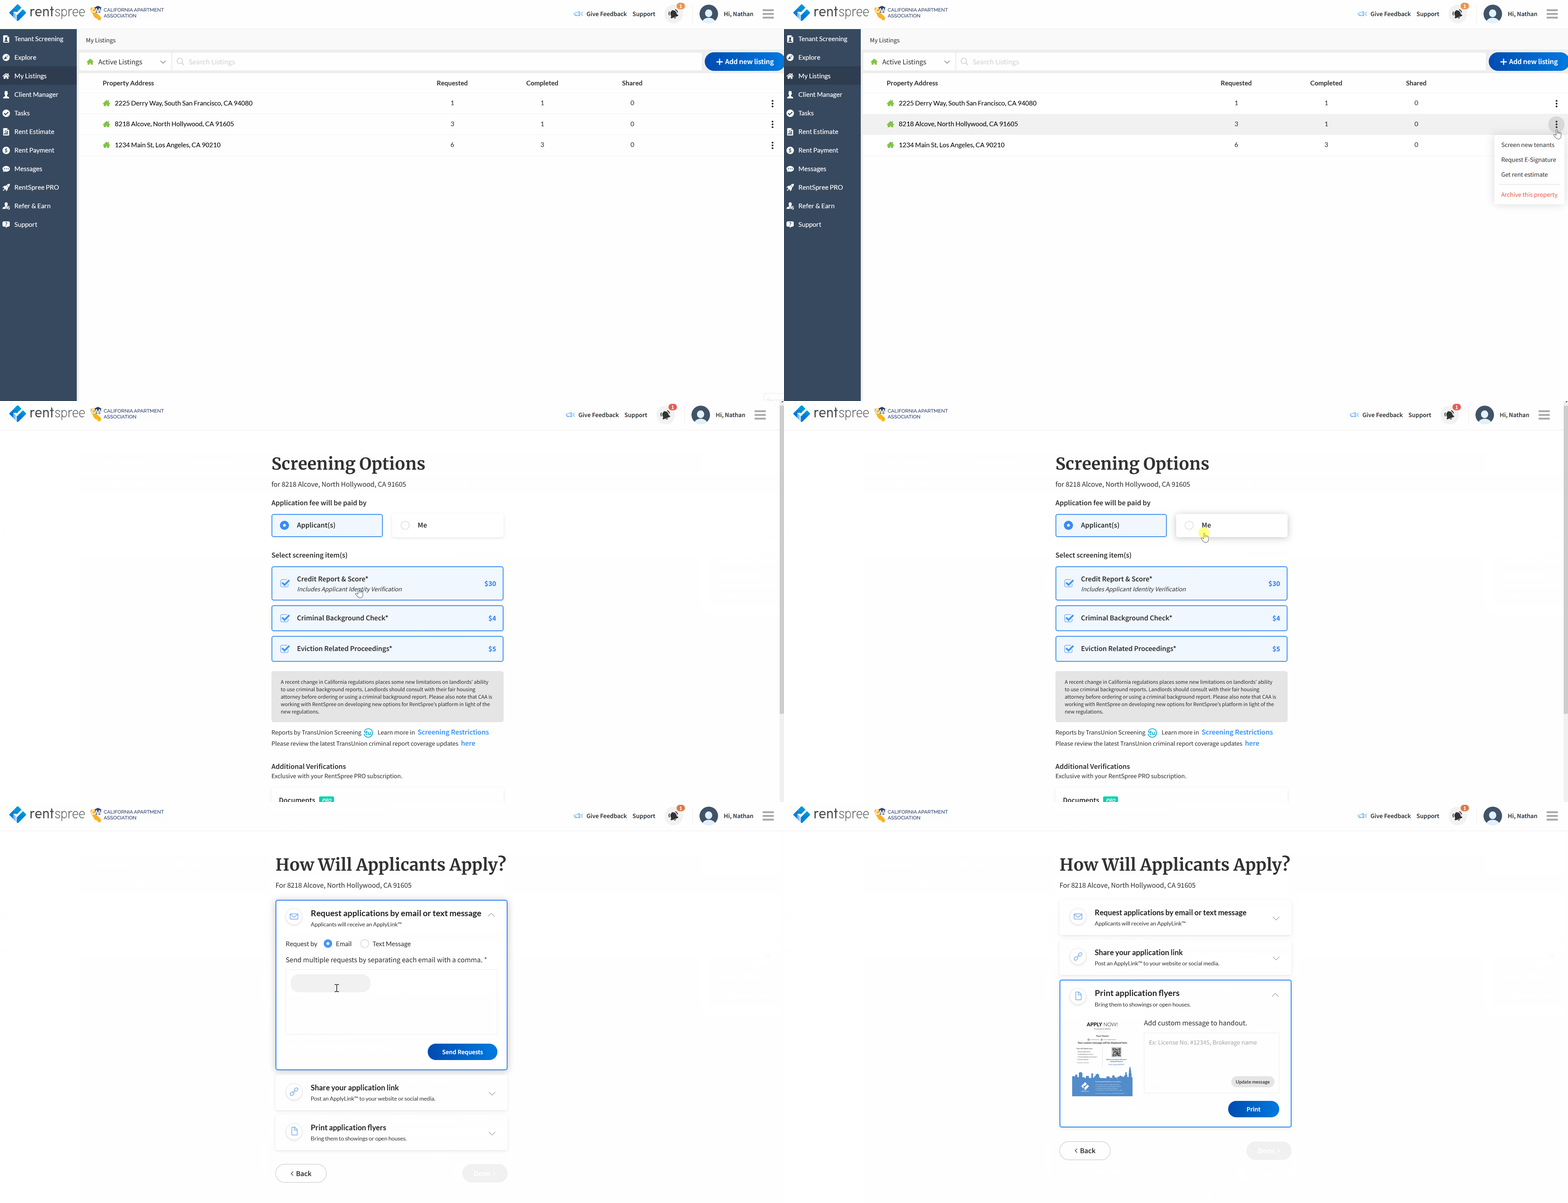
- Once you log in, from your dashboard, locate the property and click the ⋮ button on the right side of the property address. You will notice a drop-down list. Select Screen new tenants.
- If you have not yet added a property, click on ADD NEW LISTING in the top-right corner of the Dashboard. If this is your first time adding a property, you will first be asked for YOUR mailing address. This is a one-time step and the address will not be seen by applicants. You can then enter a property address.
- After you will be taken to a tenant screening page for the Property Address. Select the button that says Screen new tenants.
- Read through the TransUnion Agreement and agree to the service agreement by clicking the I accept the service agreement checkbox and pressing Next.
- On the Screening Options page, you will be asked who will be paying for the screening fee and which reports you would like included.
- If the Criminal Background Check was selected, please read the Requesting a criminal background check pop-up and press Confirm & Continue.
- Once you've selected your reports, click NEXT.

Screen with applicants' email/text
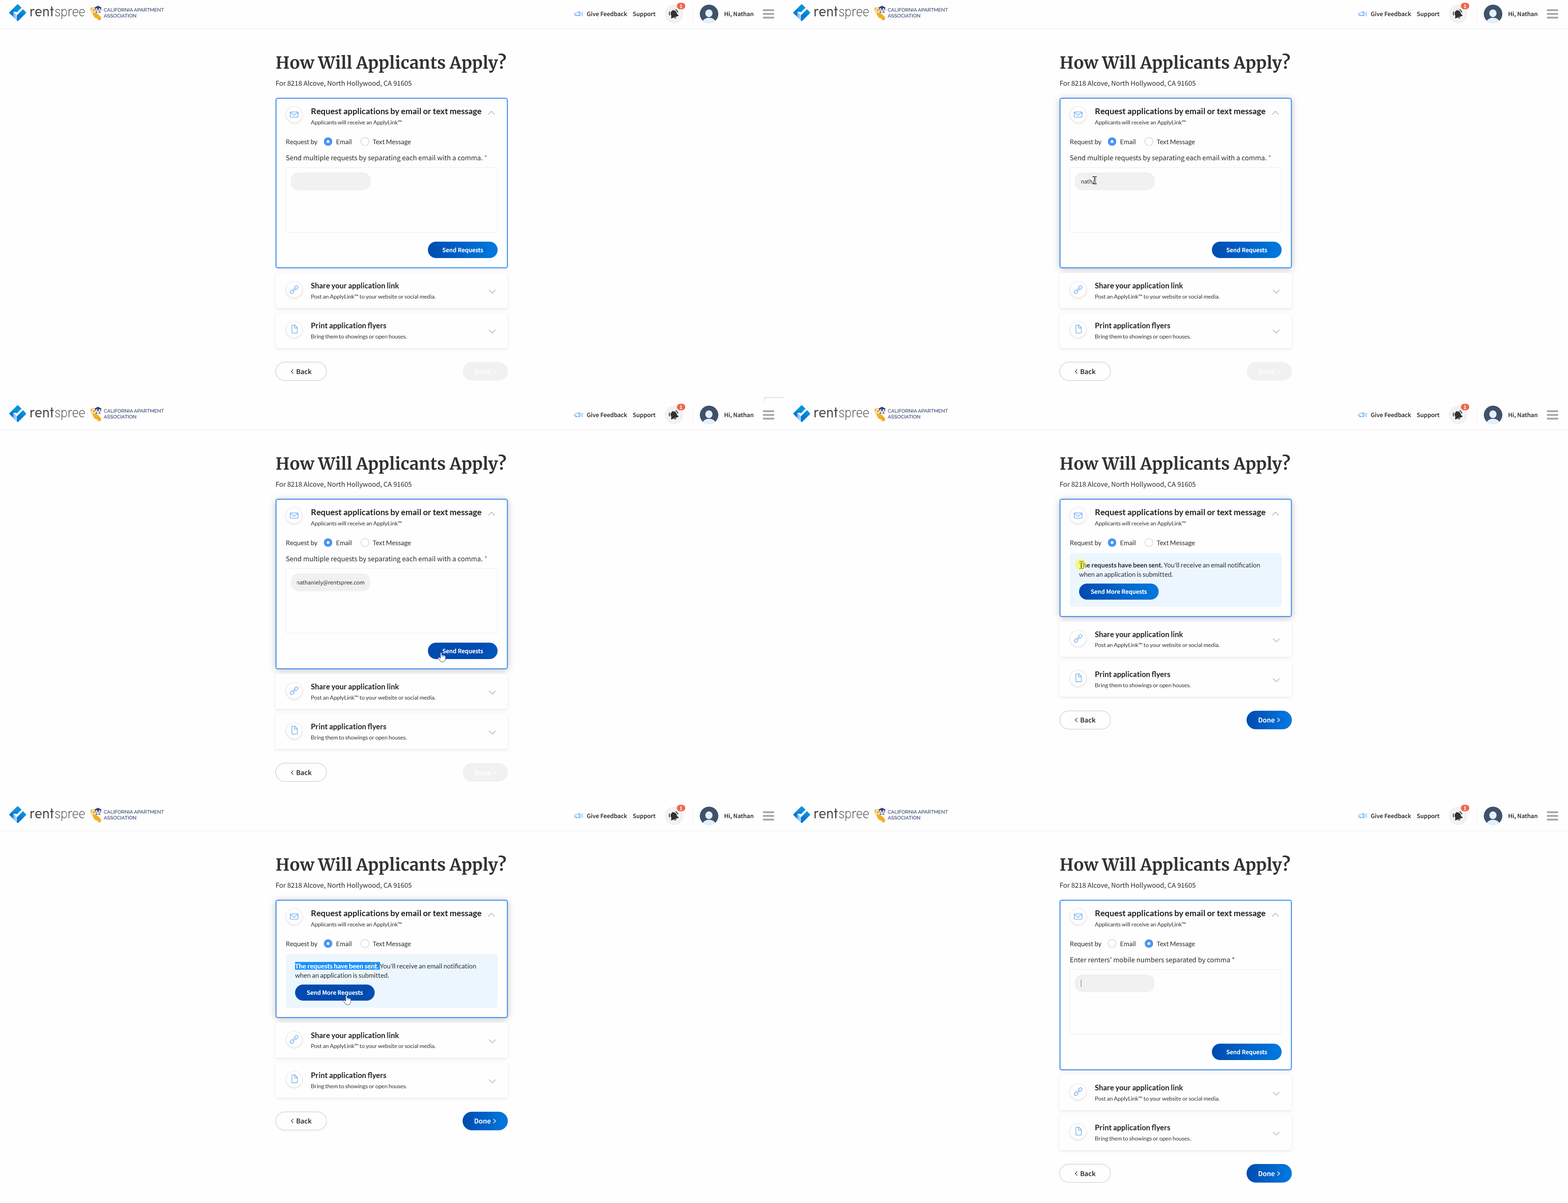
- After selecting your reports and clicking NEXT, you will be asked to enter the applicant's email address or mobile phone number.
- You can enter more than one email address/phone number by separating each with a comma or by pressing "ENTER" on your keyboard. Once done, click the Send Requests button.
- Applicants will receive an email with your name and the property address. They can now complete the rental application. If the email is not received, the applicant may need to check their spam box, or automated folders such as "PROMOTION," etc.
- If a request was sent via text, the applicant will receive a text providing them with your name, the property address, and a link to apply through RentSpree.
Post or Share the ApplyLink™
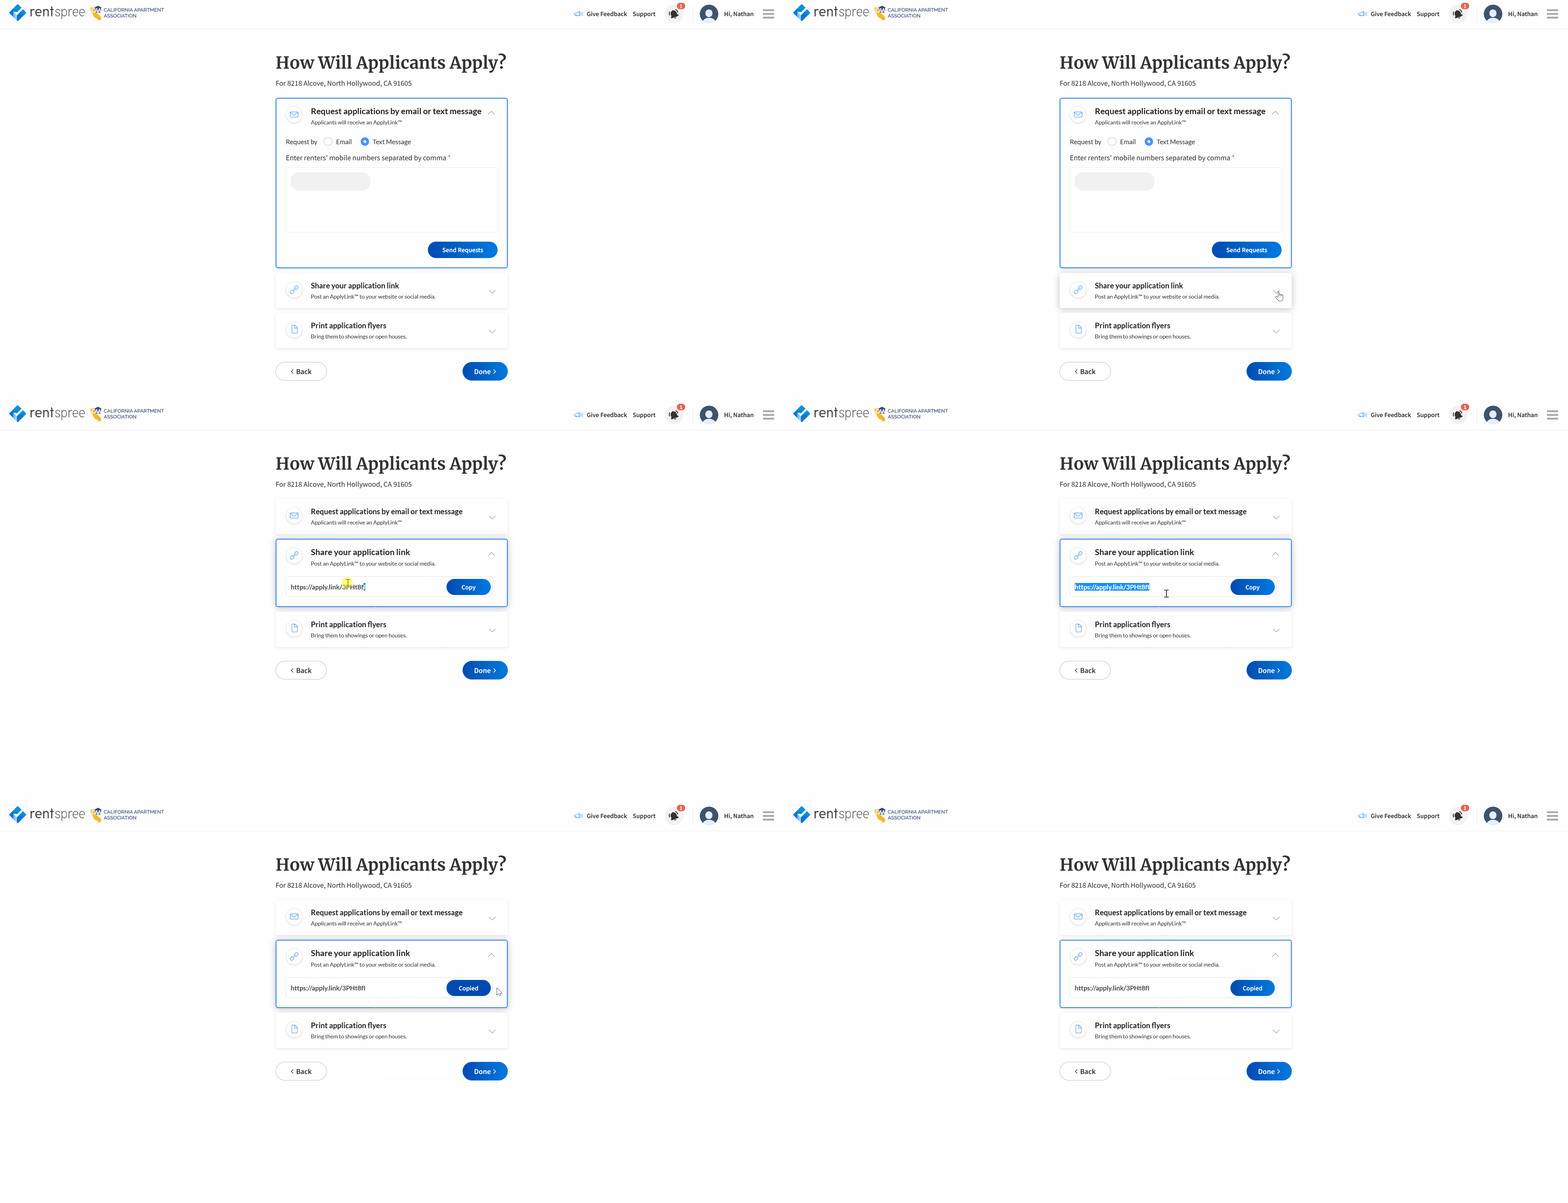
- After selecting your reports and clicking NEXT, you will be presented with a pre-made ApplyLink™ that you can share with potential applicants. Click the Copy button.
- You may paste the ApplyLink™ into a medium of your choice. ApplyLinks™ are versatile. They can be posted on a blog, social media site, MLS post, sent via a text message, and more.

Print Screening Handout™
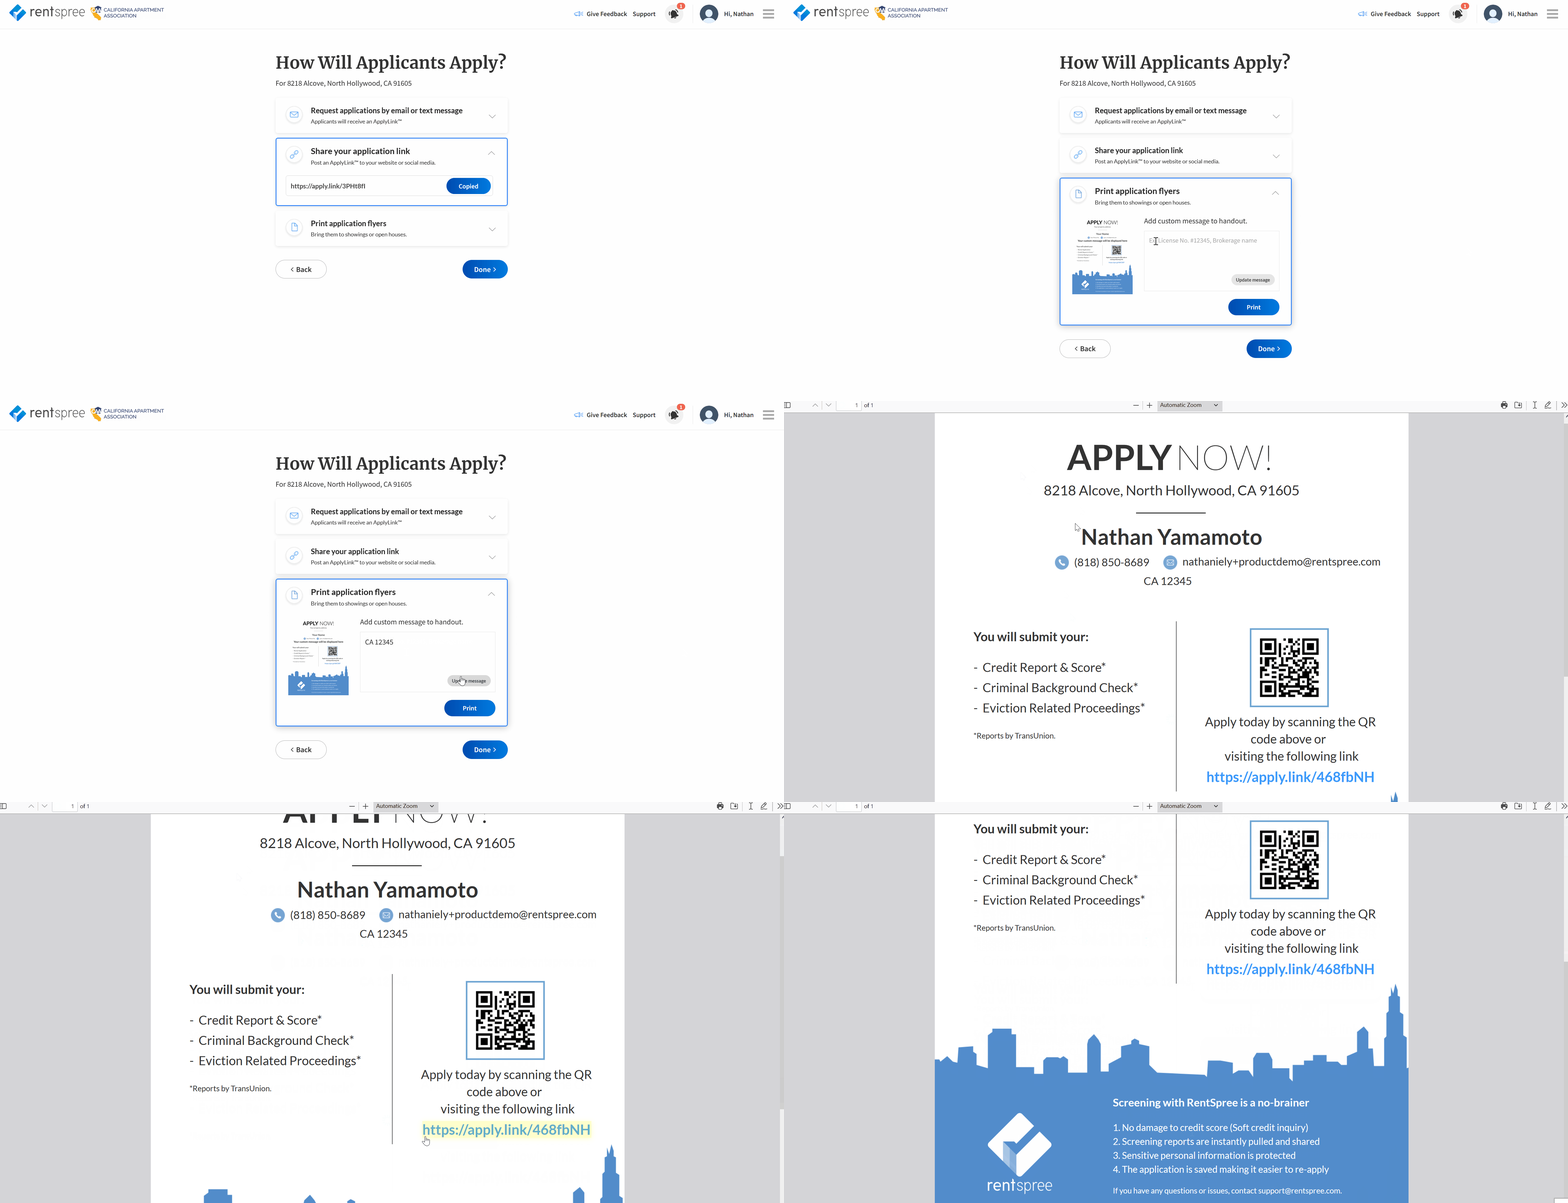
- After selecting your reports and clicking NEXT, you will be shown the Print application flyers box. In it, you can see a copy of what will be printed. In the rectangle that states, "Enter your custom message here" you may enter information such as a license number or welcome/thank you message. Once done, click the Print button.
The Screening Handout™ contains an ApplyLink™ that can be typed directly into a browser by an applicant. It also has a QR code that may be scanned with a smartphone.

.png?height=120&name=RentSpree-logo_White_Horizontal%20(1).png)
