How to Initiate Tenant Screening
-
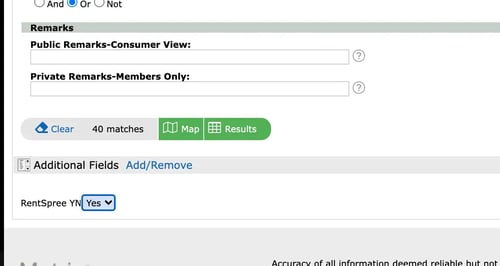
Select Yes to use RentSpree screening when creating your lease listing
-
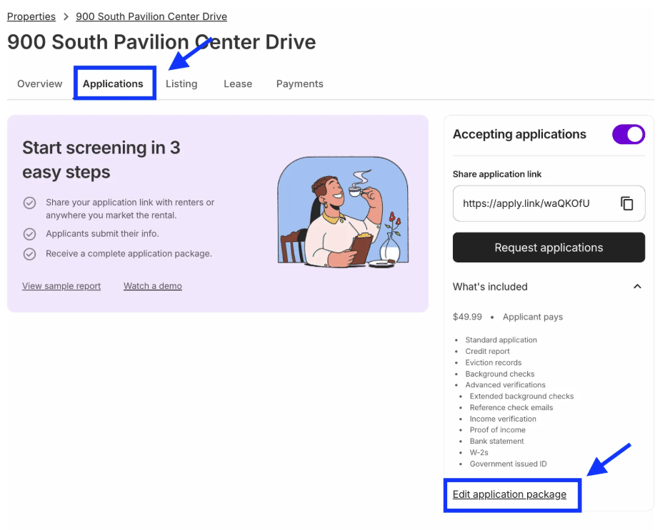
Your application link is automatically generated and will appear on your MLS listing and/or be emailed to you
-
You can copy and paste the application link and share it with other applicants directly
-
-
Applicants complete screening online, pays screening fee, and reports will be available on the RentSpree dashboard to view, download, and share
Why RentSpree Screening
-
Saves time: Collect online applications easily
-
Thorough: RentSpree package offers (may vary depending on local regulations)
-
Credit, eviction, criminal background reports from TransUnion
-
Income verification documents, reference checks
-
-
Compliant: Meets FCRA and local regulations
FAQs:
-
What do I get back when I run a screening? You can view a sample report here to see what the results look like.
-
How can I change my screening package? You can update your screening package anytime by logging into RentSpree, going to the Properties tab, selecting your property, and clicking Edit application package.
-
Can I reuse an application link? Yes — you can share the same application link with multiple applicants. Each applicant’s information and reports will appear as a separate application in your RentSpree dashboard.
-
Who pays the screening fee? By default, the applicant pays the screening fee when submitting their application. However, agents can create a custom link that allows them to pay the fee when viewing the applicant’s reports.
-
Where can I find more information or help? You can find additional guidance and FAQs about RentSpree’s screening process here.