Send a screening request in a few minutes: review what’s in the package, then invite applicants by email, link, or flyer. Reports come back to your Applications tab when they’re ready.
How to create a screening request
-
From Properties, select the property, then the Applications tab, then Screen tenant.

-
Review and accept the TransUnion ShareAble service agreement (first time only). State laws affect what screening reports can include, and the agreement links TransUnion’s restrictions by state.

-
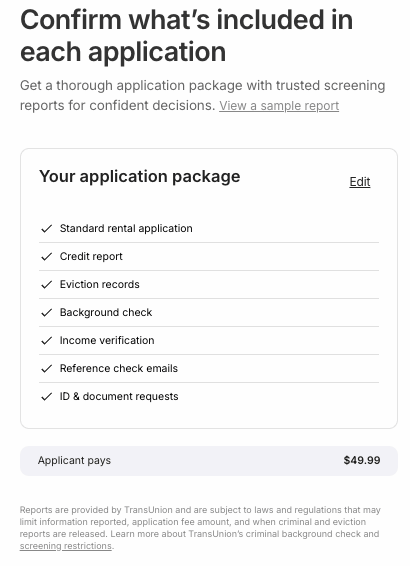
Review your application package. By default it includes the standard rental application, credit report, eviction records, income verification, reference checks, and document requests, with the fee charged to your applicant. To change what’s included or pay the fee yourself, select Edit: customize your screening package.
-
If your package includes a background report, confirm once that you’ll consider each applicant’s full qualifications before using criminal history in a decision.
Fair housing laws, federal and local, govern how criminal history can be used in rental decisions. If you’re unsure, speak with an attorney before ordering or acting on background reports.

-
Invite your applicants: enter email addresses or phone numbers and select Request applications, copy the application link to share anywhere, or generate a QR-code flyer for open houses and showings.

RentSpree guides your applicants through the application and payment, then notifies you the moment reports are ready in your Applications tab. Ready to start? Go to your properties.