A Guide to Searching, Filtering, and Tagging Contacts
This article includes step-by-step guides to search, filter, and tag contacts in the Client Manager.
Searching for Contacts
- Click on the Contacts tab from the left-side navigation bar.
- Locate and click on the Search Contacts bar.

- Enter the contact's name or email address in the search bar. A list of contacts matching the search criteria will then appear below the search bar.
Filtering a Search
- Click on the Contacts tab from the left-side navigation bar.
- Click on the Filter button.

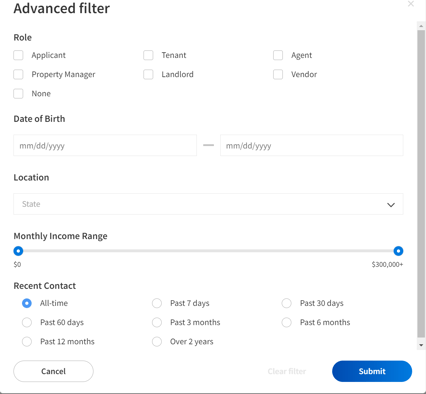
- You will then see the "Advanced Filter" pop-up (screenshot below) which allows you to select your preferred search filters. Once you've made your selections, click on Submit. If you no longer wish to apply filters, click Cancel to go back to the Contacts page.

Tagging Contacts
You can add a tag to specific contacts, allowing you to group these for quicker access. You can create a tag directly from the Contacts overview page when adding a new contact or after adding the contact.
Adding a tag when adding a new contact:
- Click on the Contacts tab from the left-side navigation bar.
- Click on the Add Contact button.

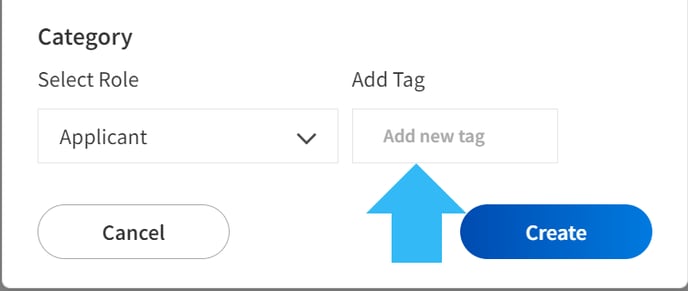
- Once you've entered the contact's details, type in a tag name in the Add Tag field. Then, click Create.

Adding a tag from the Contacts overview page:
- Click on the Contacts tab from the left-side navigation bar.
- Locate the name of the contact you wish to tag, and to the right of this, click on the + Add Tag button.

- Enter your preferred tag name, then click + Create tag. Your tag will then be added to the contact.