Traditional banks give you checking accounts. RentSpree gives you a financial hub designed for rental income where your money grows faster, expenses stay separate, and every transaction connects directly to your properties.
Get interest on collected payments, send payments, virtual cards, and organized transactions — all in one place.
Please note that to collect interest on payments collected with RentSpree Money, a Landlord PRO subscription is required
- How to Register For RentSpree Money as an Individual Sole Proprietor
- How to Register For RentSpree Money as a Single - Member Business or Multiple - Member Business
How to Register For RentSpree Money as an Individual Sole Proprietor
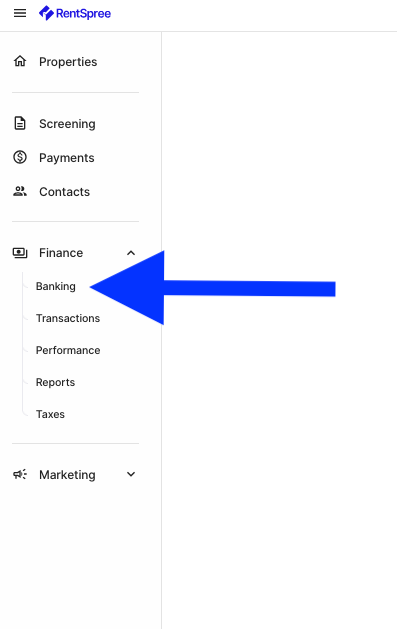
1. On your RentSpree Dashboard, click on the Banking button under the Finance tab
2. Once on the Banking page, click Get Started

3. On the Create Your Account page, click Individual Sole Proprietor

4. Next, enter your personal information

- A Verification Code will be sent to your phone, enter the code in the pop up

5. Another form will appear that will require your Date of Birth, SSN, Occupation, and Physical Address
6. Enter your Business Information

7. Read and sign certification

8. Consent to Electronic Records, Disclosures and Signatures

9. Review and Submit all information

10. Your application will be reviewed - a notification will appear once the application has been approved

11. Once accepted, you'll be directed to your Banking Dashboard where you may fund your account, view your virtual and physical debit card, pay someone, and more!

How to Register For RentSpree Money as a Single - Member Business or Multiple - Member Business
1. On your RentSpree Dashboard, click on the Accounts button under the Finance tab

2. Once on the Banking page, click Get Started

3. On the Create Your Account page, click Single - Member Business or Multiple - Member Business
4. Next, enter the business Name, DBA (Optional), and Business Website

5. A new form will appear that will require the business EIN, Entity Type, and other information

6. Enter the Control Person Information

- A Verification Code will be sent to your phone, enter the code in the pop up
7. Read and sign certification
8. Consent to Electronic Records, Disclosures and Signatures
9. Review and Submit all information
10. Your application will be reviewed - a notification will appear once the application has been approved
11. Once accepted, you'll be directed to your Banking Dashboard where you may fund your account, view your virtual and physical debit card, pay someone, and more!