A Guide for Agents Assigning a Landlord to a Property Listing on the RentSpree Dashboard
Landlords can be added to Property Listings when adding a Property, sharing an application, and even during the setup of Rent Payment!
Adding a Landlord to a New Property Listing as the Listing Agent
Adding Landlord to a Pre-Existing Property
Adding a Landlord when Sharing a Screening Package
Adding and Sending a Landlord a Request to Collect Payments on RentSpree
Adding a Landlord to a New Property Listing as the Listing Agent
1. Select Properties from your Dashboard, followed by Add property

2. When entering the property address, select your rental property from the list RentSpree generated or select Enter address manually
- A pop up will appear to confirm the property address, once you press confirm the address can no longer be edited
3. When asked what your role for the property is, select Listing Agent and a form will populate to add the landlord's information

4. The landlord's information has now been successfully added to the property!

Adding Landlord to a Pre-Existing Property
1. Select Properties from your Dashboard
2. Click the property address you would like to a landlord to

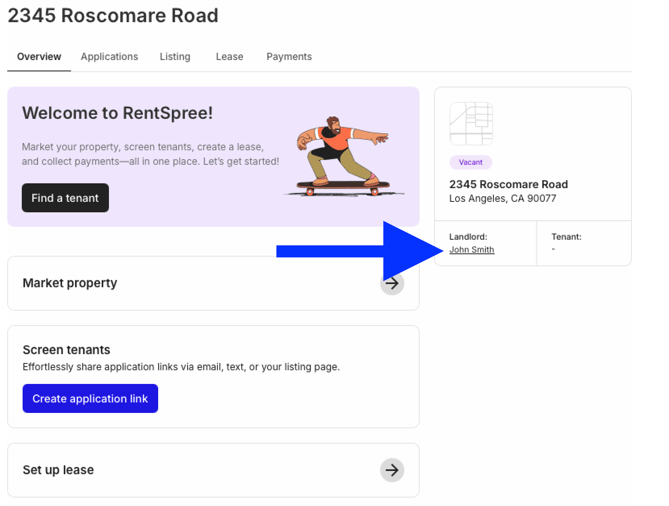
3. Select Add Landlord on the property overview page

4. Add the landlords information and click Update to save their information to the property listing

Adding a Landlord when Sharing a Screening Package
1. Click the Screening button on your RentSpree Dashboard
2. Select the Submitted application

3. When viewing the report click the Share application button

4. When entering the email you would like to share the submission with, click This is the landlord to save the landlord's information to the property listing

5. Click the Share application button to share the reports and save the landlord's email to the property listing
Adding and Sending a Landlord a Request to Collect Payments on RentSpree
1. Select the Payments option from your Dashboard
2. Choose the Request Payments option

3. Under the First, who'll receive this payment? page, select the My Client option

4. Enter the Property & Tenant information

5. A pop up will appear asking to enter the landlord's information

6. Select the payment type: Rent, Deposits & other fees, or both

7. Enter payment details

8. Review your payment information and click Send Request

9. A confirmation will appear that a message from RentSpree was sent to the landlord to connect their banking information to collect the funds from the renter

10. To track the payment, you'll be emailed once the renter pays the landlord and the Client Payments tab will appear with the status of the payment
