How to create an account with RentSpree
When creating a RentSpree account, you may sign up for free using 3 different methods. Once a account has been created, users will have the option to set up their account with their information and more:
- Using your email address
- Using your Google Account
- Using your Facebook Account
- Steps after creating a RentSpree account
Creating an account with your email address
1. From our home page, click on Sign up for free in the top right corner

2. You will be taken to a new page to create your account
- Enter your email address

3. After entering your information, a Verification Email will be sent to your inbox with a 6 Digit Code
- If the Verification Email does not appear in your inbox, you may press the Resend button to send it again. If the Verification email still does not appear, please check if your email address was entered correctly

4. Once the verification code has been entered, you'll be able to create an 8 character password for your RentSpree account and log in.

Signing up with RentSpree using your Google account
1. From our home page, click on Sign up for free in the top right corner
2. On the Sign Up page, click the Continue with Google button

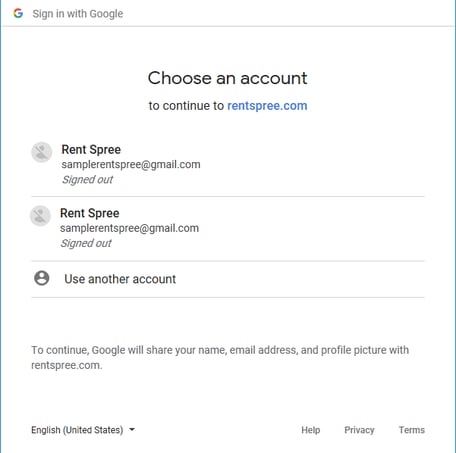
3. After, a page will appear asking you to select which Google account you would like to use.
- If you have previously signed in to Google on this device, you will be asked to select which account you would like to use. If this is your first time signing into Google on this device, then you will be asked to either enter your login information OR you will have to click on Use another account.
4. Once you select which account you would like to use, enter your password and click Next.

5. Once you agree to the Privacy Policy and Terms of Service you will be logged into your RentSpree account
Signing up with RentSpree using your Facebook account
1. From our home page, click on Sign up for free in the top right corner
2. On the Sign Up page, click the Continue with Facebook button

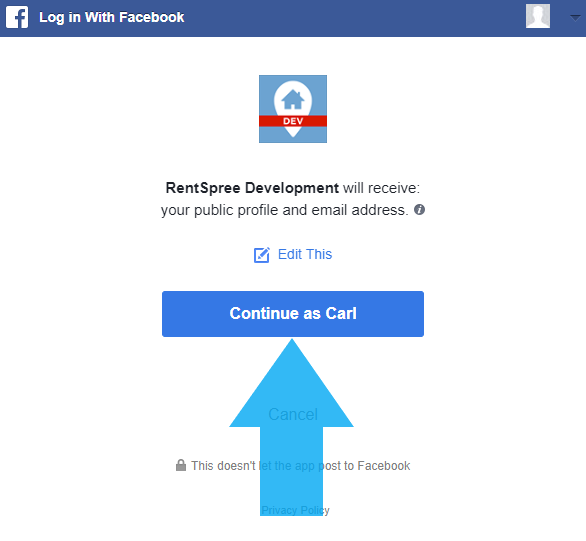
3. Once you click on Facebook, a pop-up box will ask you to sign in to Facebook. Enter your login credentials and then click Log In

4. Once you've logged in to Facebook, you will be asked to confirm that you are connecting and you'll be logged into your RentSpree account after
Steps after creating a RentSpree account
Once you sign up using Google, Facebook, or an Email Address, follow the steps below to set up your account and initiate features on the RentSpree dashboard:
- Click the Get started button to set up your account

- Enter your First & Last Name as the owner of the RentSpree account

- Select the I’m managing or renting out a property option if you're a property representative/renter agent
- Applicants will select the I’m looking for or renting a place option to apply to listings or pay rent/deposits

- Applicants will select the I’m looking for or renting a place option to apply to listings or pay rent/deposits
- Property representatives or renter agents will have the option to start and initiate the following features:
- Market your property: Property Representatives can create a listing page to show property photos, amenities, and more!
- Screen tenants: Screen applicants to get their rental application and TransUnion screening reports
- Set up a Lease: Use RentSpree's lease feature to upload or use an applicable lease template and send those documents out for electronic signature
- Collect payments: Collect rent, deposits, fees as a landlord, property manager, or property representative
- Maybe later, I just want to explore: Explore the dashboard and review all the products RentSpree has to offer

- After selecting your options, you'll be asked to select your role. Please note that any role selected will have all RentSpree products and features available, as there are no differences between each role
